Chirag's Blog
Debugging with Source Maps: A Comprehensive Guide
March 9, 2025
We all have been there, working on a new feature for 10+ hours straight, and everything is going well. You build your project and push the code to production. And boom, a new production error alert! Everyone in your team - whether at a company or a hackathon - starts to look for someone to blame. Found it; it was from you. But none of your test suites resulted in an error. Everything with the code itself looks excellent.
You check the logs. The error is:
You think to yourself, what the heck is app.min.js:1:45678 supposed to mean? There was no file like that in the entire source code? Your file was called app.js. And it's 45678 characters long! That's impossible to debug!! Still, you try to open the file and potentially find the root cause of the error. It's a mess. The entire file is filled with random gibberish you are unable to understand. What should you do?
Now, this is where Source Maps come into play. Source Maps allow you to map the minified code in your production environment, aka the random gibberish you just saw, with the actual source code, allowing you to pinpoint the root cause of the error in your source code and debug it effectively.
In this blog, we will detail what source maps are, why and how they are created, and give some tips on effectively using source maps to debug your code. Let's dive in!
Why is source code minified?
Before we delve into Source Maps, let's first decode what happened to your clean, formatted and linked source code and why it looks nothing like it on the browser.
The simple answer is minification.
Minification is the process of converting your source code into production-ready code without changing any of its functionality. This is typically done by the bundler you are using, such as Webpack. To learn more about bundlers, you can check out this awesome guide on Javascript bundlers by Snipcart.
Simply put, bundlers optimise your source code by stripping out whitespaces, comments, and redundant code and even removing or renaming variables for shorter alternatives. This makes your code super efficient and much smaller in size.
Why does this happen?
- Improved load times - Smaller file sizes lead to better website loading times.
- **Obfuscation—**Although it won't make your code entirely illegible, it does make it harder for regular users to understand.
- Browser Performance - The code is altered in a way that's easy for browser engines to parse.
Here is an example of what a minified React app code looks like:
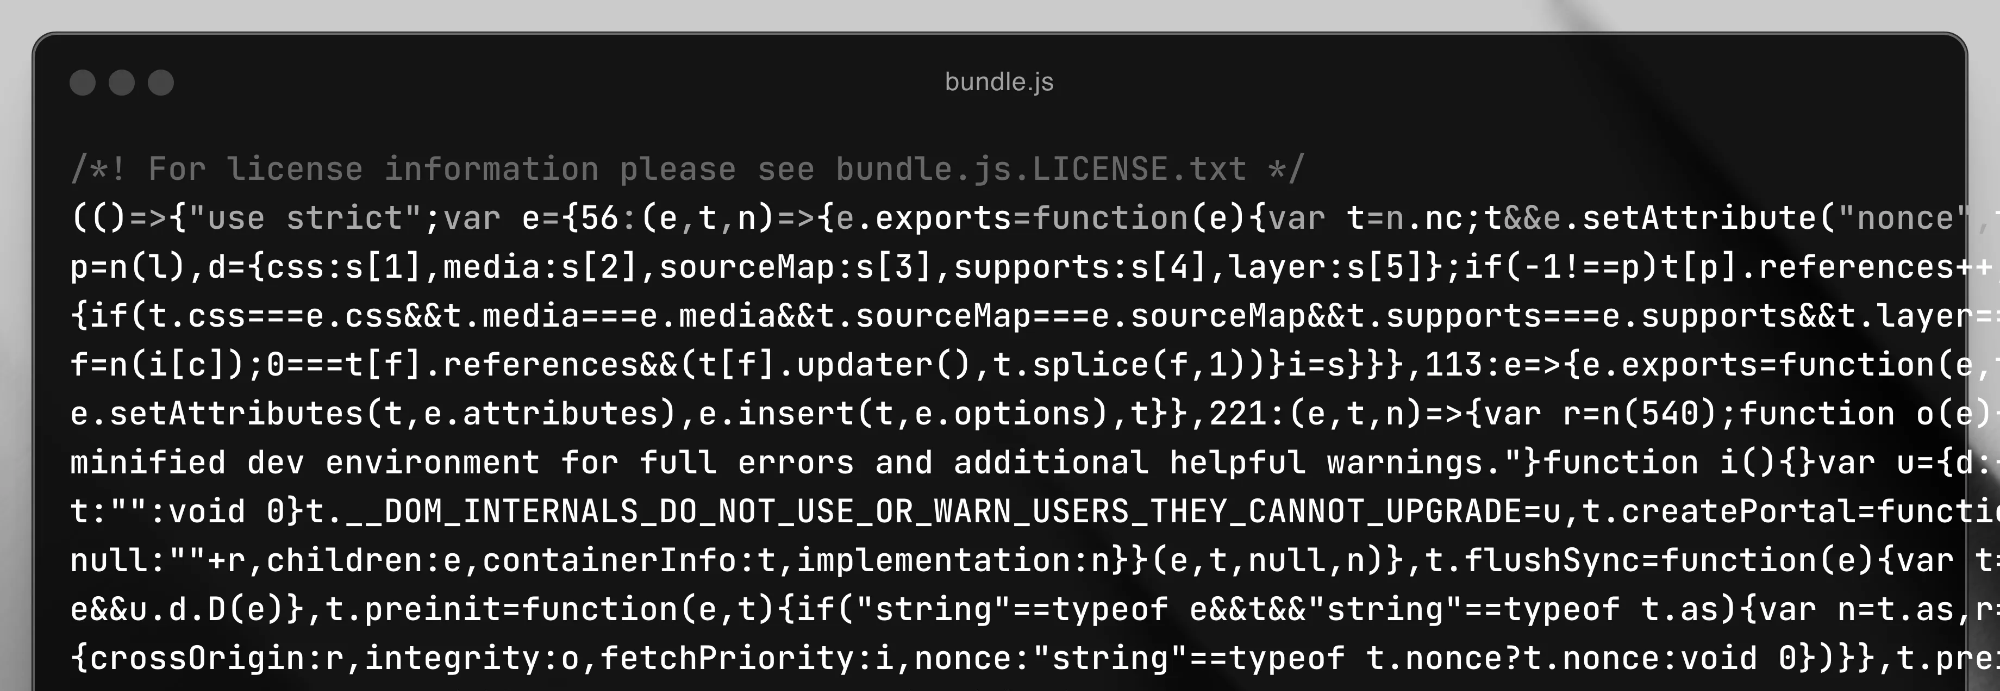 bundle.js file created by Webpack on building a simple React app, even the text is overflowing from the terminal screenshot!
What are source maps?
Source maps are files whose names end with .map and that map the minified code to your actual source code. Examples of such files can be example.min.js.map or for css, styles.css.map. They are explicitly generated only by build tools like Webpack, Vite, Rollup, Parcel etc. Since source maps are only required for debugging purposes, these tools usually have the option to generate source maps off by default. For example to enable it in Webpack, you can do:
or add it to your webpack.config.js file:
A source map includes crucial information on how the mapping is done, including the actual source file name, the content it includes, various variable name the source code has, name of the minified code file etc.
Here is a format of how a typical source map file looks like:
The most important section here is mappings. This uses a special kind of encoding called VLQ base 64 encoded string to map the lines and locations to compiled file and its corresponding original file.
Visualising source maps
"Okay, great!" I hear you saying. "How is this actually helpful? I still can't read the source maps and manually decode the mappings."
That's a great question! This brings me to the main highlight of this blog—source map visualisers. These tools allow you to see the mappings in a visual manner to locate and debug the problem effectively. There are many source map visualisers on the market, but today, we will be focusing on Sokra & Paulirish's source map visualization. You can find the source code for this on their Github Repository.
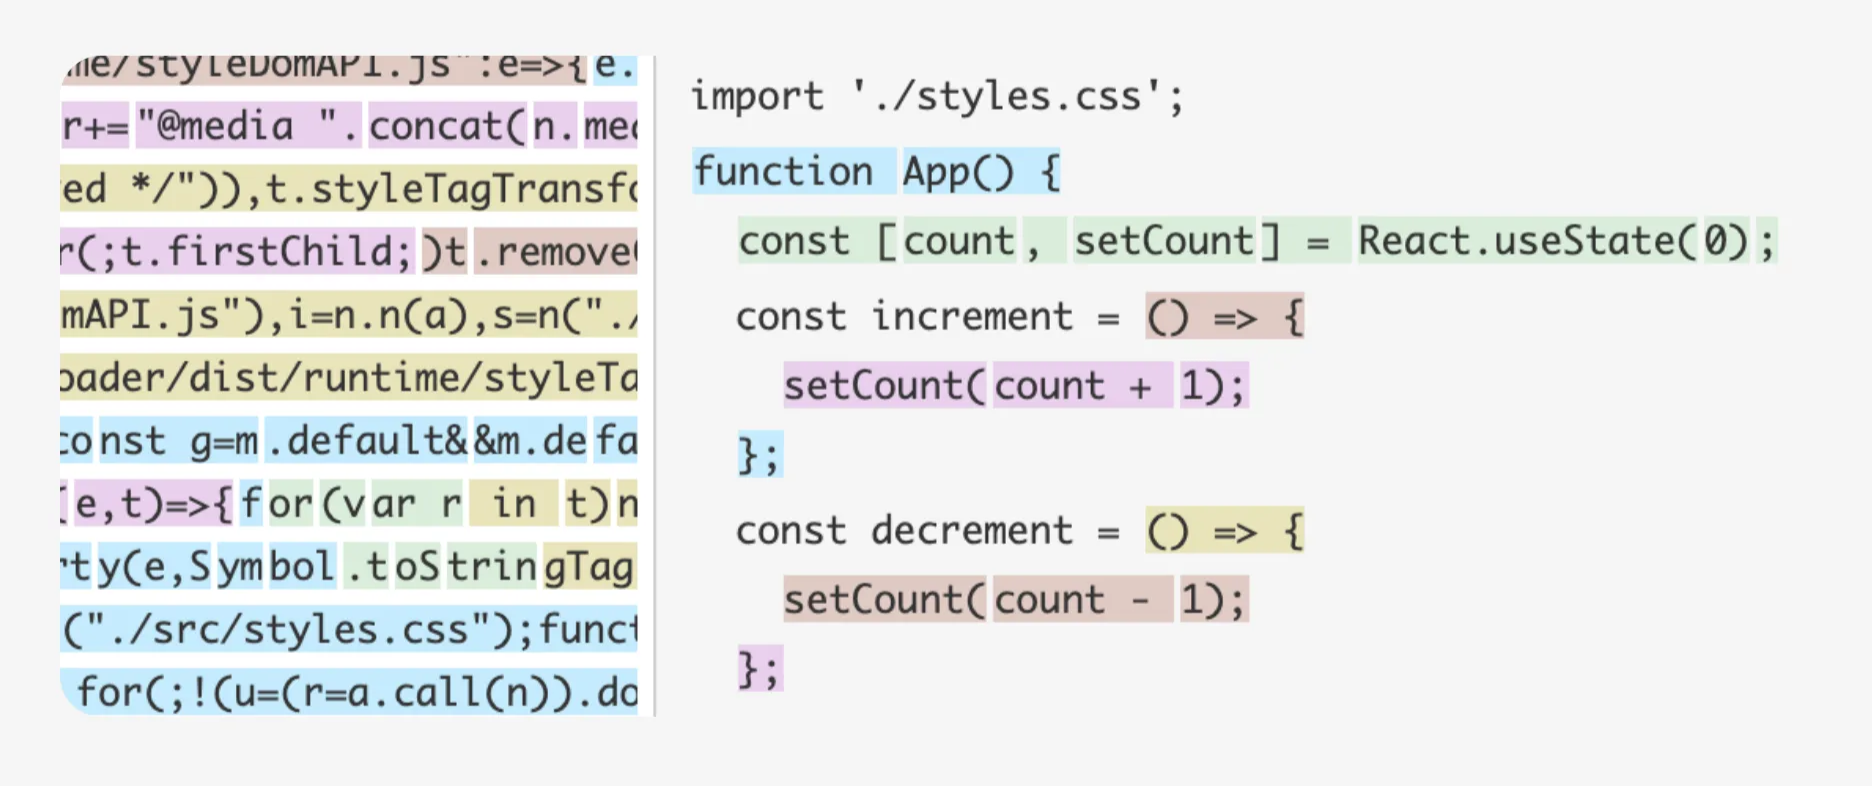
Here is a side-by-side comparison of how your code (on the right-hand side) can look like a jumbled mess when minified (on the left-hand side). However, the colour-coded mapping of the visualiser helps us map these two codes by hovering over them.
Working Example
Let’s create a simple React app and play around with it’s sourcemaps!
- Start with creating a project directory:
- Init a new project:
- Add the following dependencies into
package.json
- Create a
src/index.jsfile with following React code:
- Add styling by adding a
src/styles.cssfile:
- Now define the webpack config by creating a
webpack.config.jsfile in the root folder:
- Now you can start the application by running:
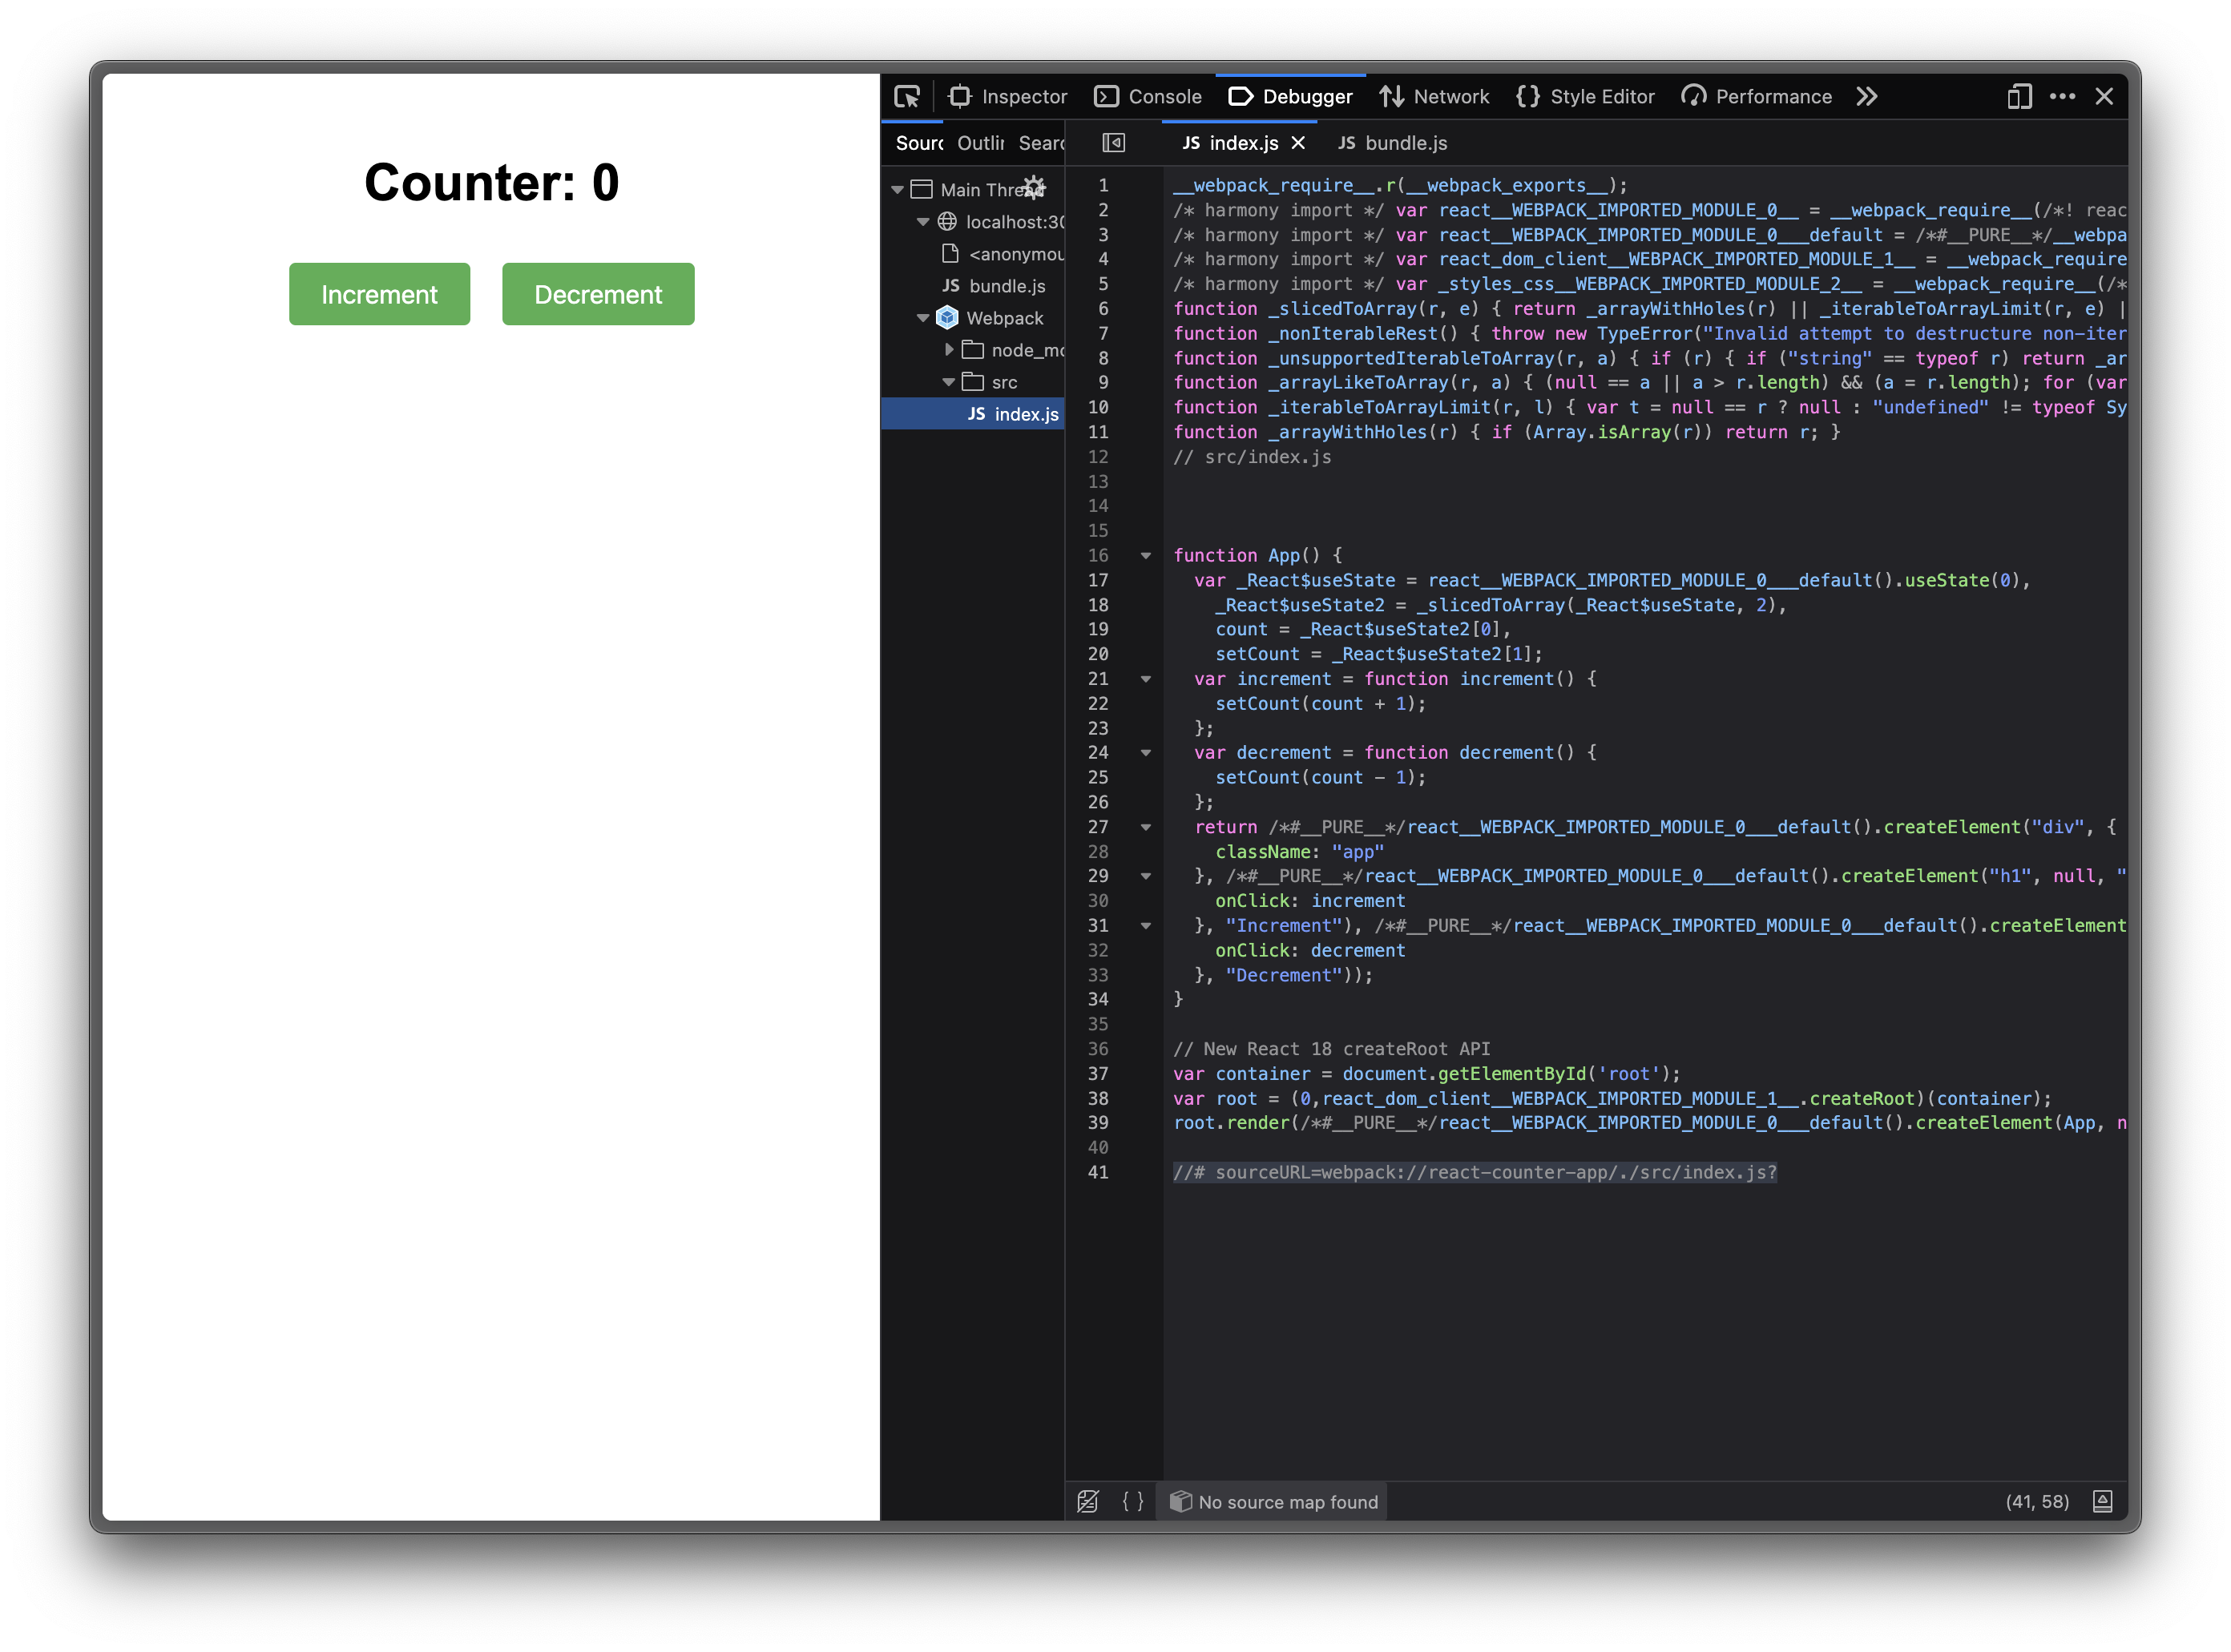
This is how it should look (very basic i know :D):

You can find the source maps using your browser's dev tools. The format can look different depending on the browser you are using. Here, I am using Zen, but the format should look similar for all browsers.
You can do so by right-clicking anywhere on the page and clicking on Inspect Element. Then, go to the Sources section of your browser and find the source file. Here on Zen, it's available in the debugger section since it's mainly used for debugging purposes.
Now, you can load this in the source-map-visualization. It will look something like this:
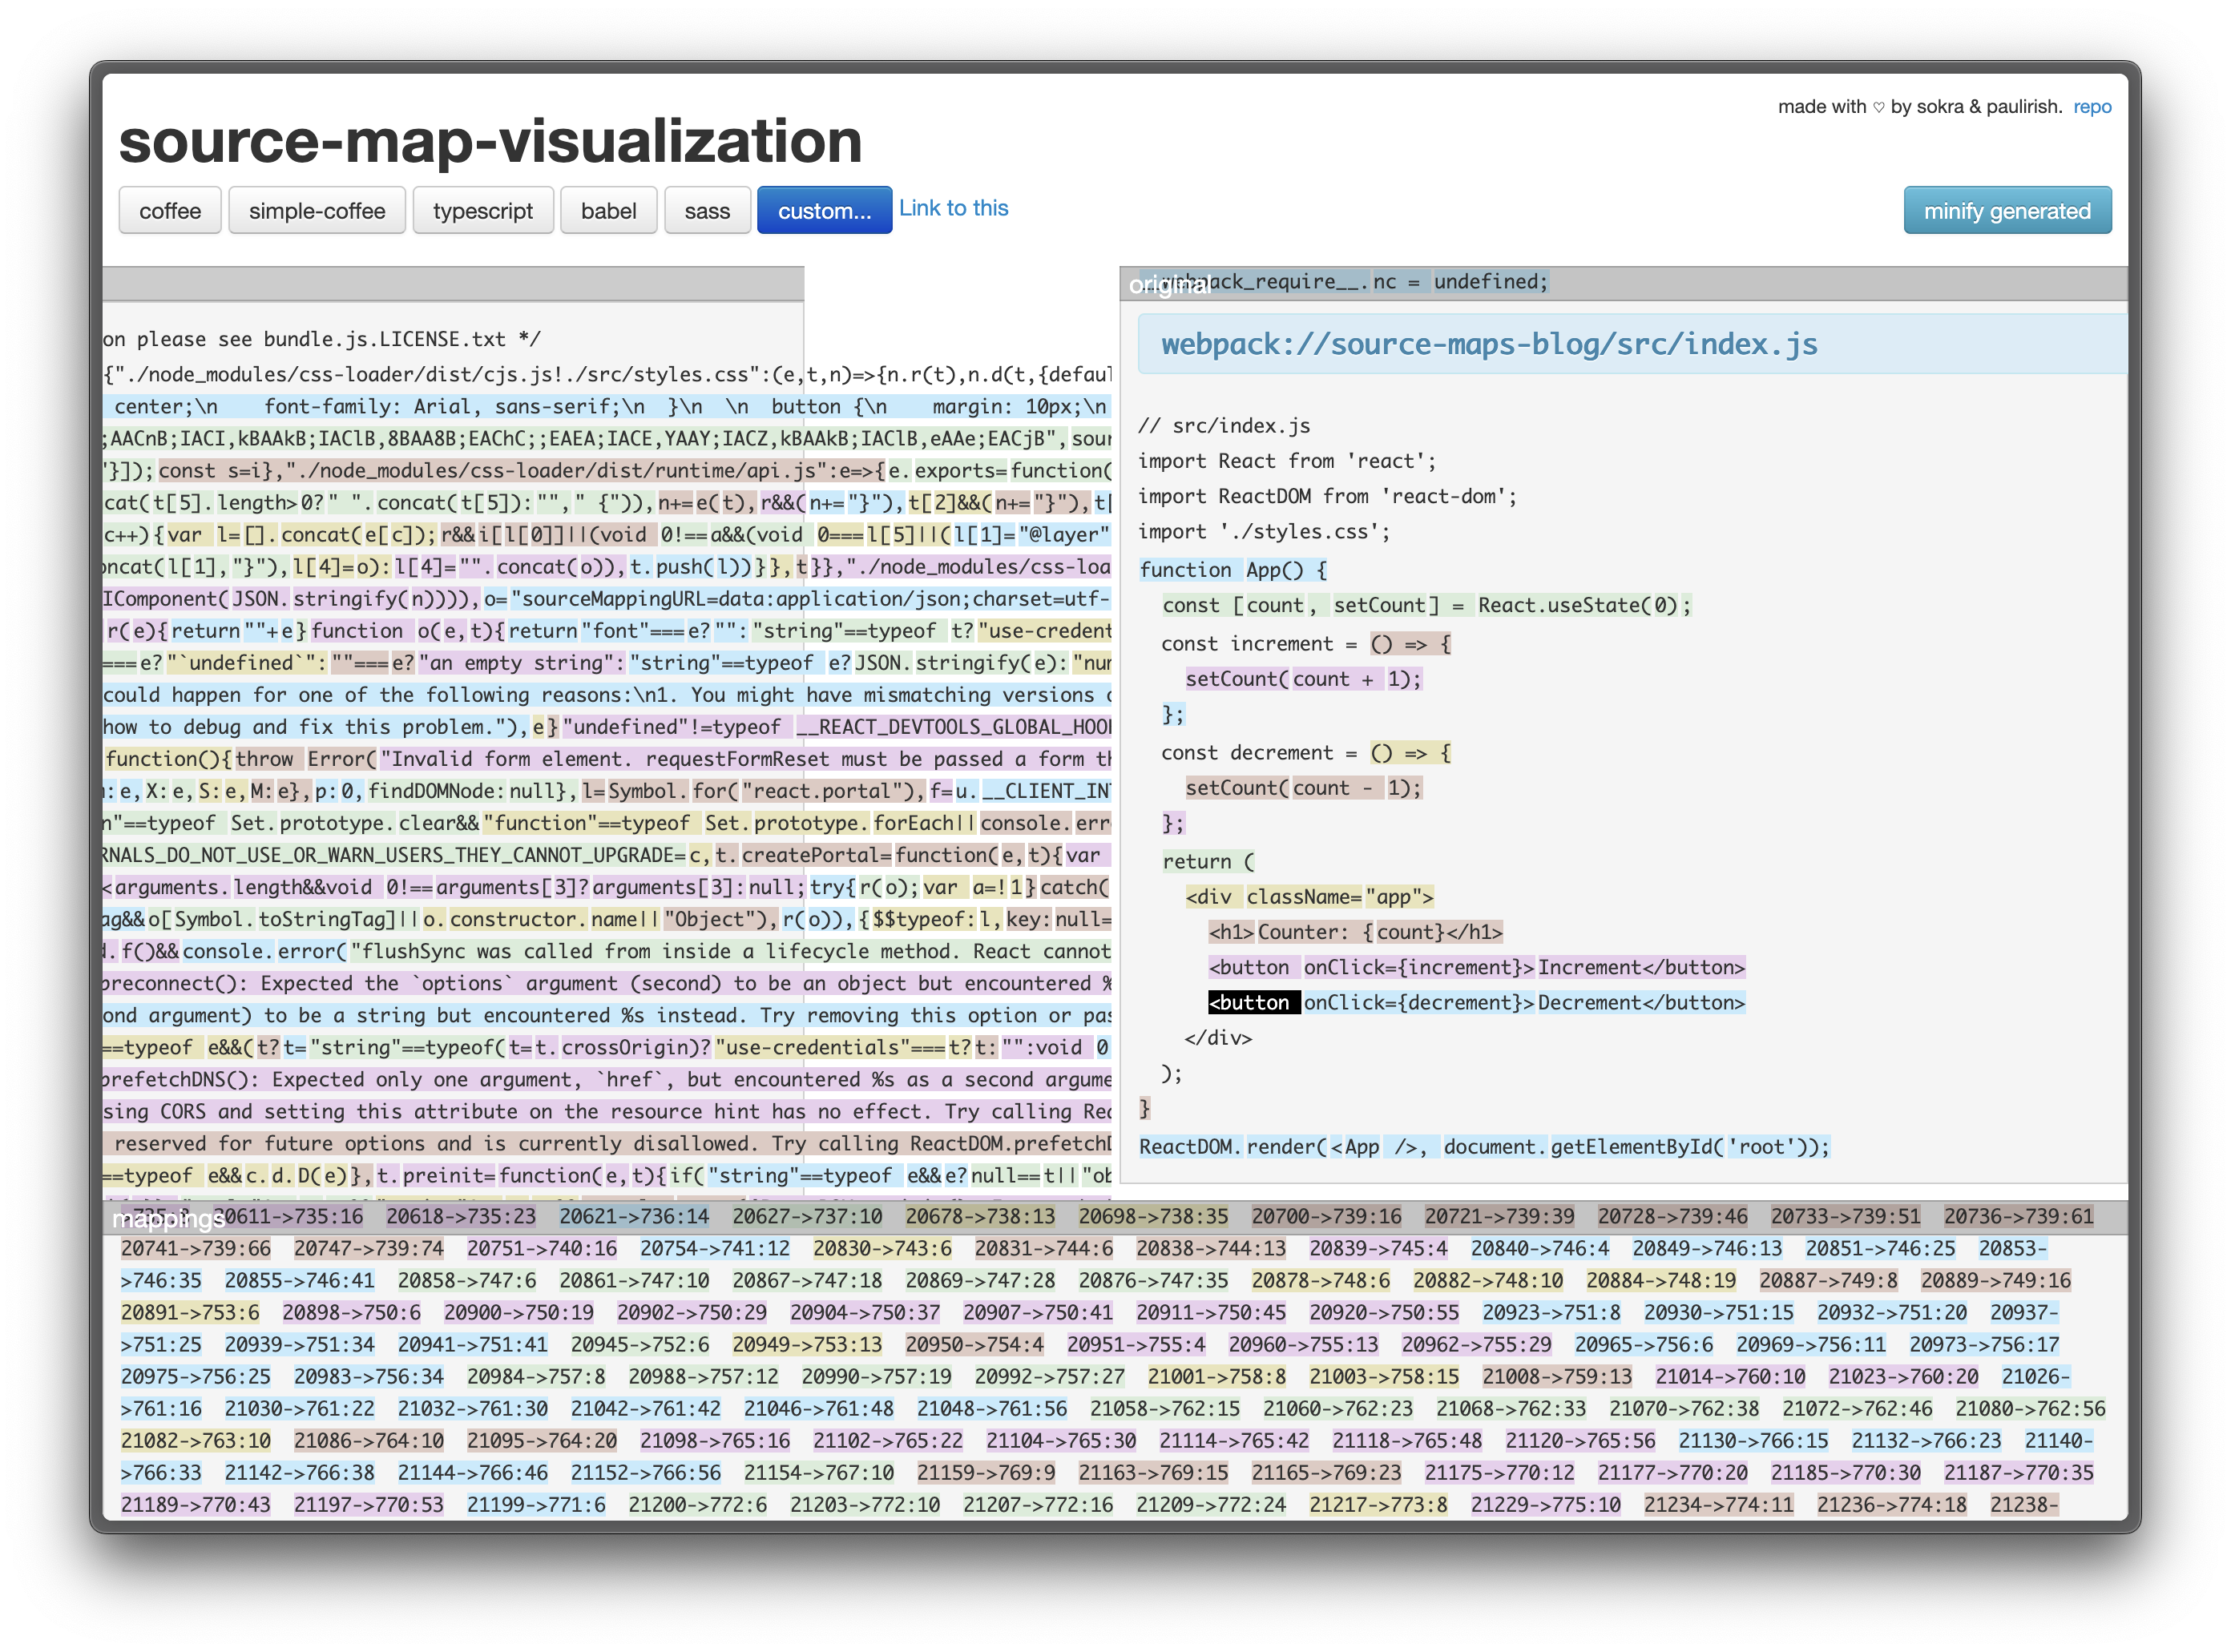
On right you can skip all the React code and skip to the section that contains just your code. On hovering over each section of your code you will see exactly which part of the minified code it maps to!
It can look pretty confusing at first, but try hovering over various elements in the UI and you will see how intuitive it actually is. For eg. in this example code,
Hovering over React.useState reveals that it maps to a createElement in the minified code. So our bundler, Webpack, in this case, optimised our code by directly converting our state into a javascript element and directly modifying it in subsequent code. This makes our application much, much more performant and reduces the file sizes the browser has to load!
Security Considerations
While creating the example app, you may have noticed we had to explicitly add the flag --mode development to the Webpack run command. This is because source maps are supposed to be used for debugging purposes only, and can lead to security concerns when used in production, including:
| Concern | Description | Mitigation |
|---|---|---|
| Exposing Source Code | Source maps reveal your original code, including comments and logic | Use hidden-source-map or nosources-source-map in production |
| IP Protection | Intellectual property may be exposed via full source maps | Deploy source maps to secure, authenticated location |
| File Size | Source maps can be large, affecting download performance | Generate maps only in development, or serve separately |
| Server Configuration | CORS issues may prevent source map loading | Configure proper Access-Control-Allow-Origin headers |
There are also tools like Sentry or Rollbar which use your source maps for better error reports without violating any of the security concerns. Tools like these are considered best practise for production environments.
Conclusion
Source maps are a mind-blowing feature that lets you map your source code precisely to the minified code loaded by your browsers, which is generated by bundlers like Webpack for performance and speed. We explored how debugging can be made easy using this feature and tools like source map visualisers to aid in the process.
The web is built on top of layers and layers of abstractions done by tools like bundlers, but when things go catastrophically wrong, we might discover that these abstractions are not always hundred percent perfect, and hence, we need to take out our tools, look under the hood, and find the fix ourselves.
To learn more about package managers like NPM, Bun, PNPM, and yarn, you can check out my other article, Mastering npm: A Comprehensive Guide to Package Management.
References
Thanks to these fantastic references by the Google Chrome dev team that helped me learn about source maps myself and in writing this article: